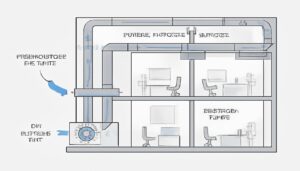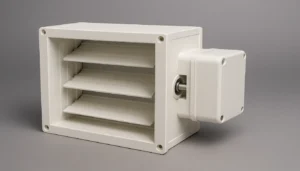

- The injection molding process has 6 core stages: clamping, injection, hold pressure, cooling, mold opening, and ejection — each directly affects HVAC part quality.
- Cooling accounts for 60–70% of total cycle time; optimizing it is the fastest path to lower cost per part.
- Material choice — PA66, ABS, ASA, or PC — must be locked before process parameters are set; changing material mid-project resets everything.
- In our factory, wall thickness consistency (±0.1 mm) is the single most common cause of warranty returns on HVAC housings.
What Is the Injection Molding Process and Why Does It Matter for HVAC?
The injection molding process is a manufacturing method where molten plastic is injected under high pressure into a precision-machined metal mold, cooled, and ejected as a finished part. For HVAC manufacturers, it is the dominant production method for plastic enclosures, damper blades, fan housings, diffuser grilles, and condensate drain components.
Here is why it matters: a correctly tuned injection molding process delivers dimensional tolerances of ±0.05–0.15 mm, surface finishes from Ra 0.4 µm up to mirror-polish, and cycle time1s as short as 15 seconds for small HVAC clips. Get the process wrong — by as little as 5°C on barrel temperature or 0.3 s on hold time — and you are looking at warped panels, sink marks on visible faces, or parts that fail UL 94 V-0 flame tests.
We manufacture HVAC plastic components for clients from the US, Germany, and Japan. The question we hear most often from first-time buyers is: “What actually happens inside the machine?” This guide walks through every stage, with the specific numbers that separate good parts from scrap.
“Cooling stage accounts for 60–70% of total injection molding cycle time.”True
Thermal conductivity of the mold steel and coolant channel design determine how fast heat transfers out of the part. For a 3 mm wall HVAC housing, cooling alone takes 18–25 seconds. Optimizing channel layout — including conformal cooling in complex cores — is the highest-leverage improvement available after the mold is built.
“Higher injection pressure always produces better parts.”False
Excessive injection pressure causes flash, overpacking, and residual stress that causes warpage after ejection. The correct approach is to use the minimum pressure needed to fill the cavity completely, then rely on optimized gate location2 and mold venting to handle the rest. In our experience, most HVAC enclosures fill correctly at 80–120 MPa — far below the 200 MPa some operators assume is needed.
What Are the 6 Core Stages of the Injection Molding Process?
Every injection molded HVAC component — whether a 5 g snap-clip or a 2 kg fan housing — goes through the same six stages. Understanding each stage gives you the leverage to troubleshoot defects at their source rather than inspecting them out at the end of the line.

Stage 1 — Mold Clamping
The two mold halves close and lock under clamping force3, typically 50–4,000 tons depending on part projected area and injection pressure. For a mid-size HVAC return air grille (projected area ≈ 400 cm²) at 100 MPa injection pressure, you need approximately 400 tons of clamping force. Under-clamping causes flash at the parting line; over-clamping accelerates mold wear.
Stage 2 — Injection
Plastic pellets are fed from the hopper into the heated barrel. The reciprocating screw melts and homogenizes the material — typically at 220–290°C for PA66, 200–240°C for ABS — and then advances to inject the melt into the cavity at controlled velocity. Injection typically takes 0.5–3 seconds. The critical parameter is fill speed: too fast causes jetting and burn marks; too slow causes short shots and weld lines on visible surfaces.
Stage 3 — Hold Pressure
Immediately after fill, the screw transitions to hold pressure4 — a lower pressure (typically 40–80% of injection pressure) held for 3–15 seconds. This stage compensates for the 5–8% volumetric shrinkage of most engineering thermoplastics as they solidify. If the gate freezes off too early, the part is underpacked. If hold time is too long and the gate hasn’t frozen, material flows backward — a phenomenon called back-drool that causes porosity near the gate.
Stage 4 — Cooling
Once the gate freezes, cooling begins. Water or oil at 20–80°C circulates through channels in the mold. The part must reach ejection temperature — typically the heat deflection temperature minus 20°C — before the mold opens. For a 3 mm wall PA66 HVAC impeller housing, this takes 18–25 seconds. Poorly designed cooling channels cause differential cooling that warps thin-wall parts. We use mold flow analysis5 on every new HVAC tool to predict hot spots before the first steel is cut.
Stage 5 — Mold Opening
The clamping unit retracts, separating the mold halves along the parting line. For HVAC parts with undercuts — snap-fit hooks, vent louvers, conduit clips — slides or lifters must retract first to allow clean separation. Insufficient draft angle (we recommend ≥1.5° for textured surfaces) causes drag marks and torn edges on cosmetic HVAC panels.
Stage 6 — Ejection
Ejector pins, stripper rings, or air blasts push the solidified part out of the mold cavity. Ejector pin marks must land on non-visible surfaces — a constraint we resolve at the DFM stage, not after tooling. After ejection, the mold closes and the cycle repeats. Automated downstream trimming, inspection, and packing complete the production loop.
How Are Process Parameters Set for HVAC Plastic Parts?
Process parameters are not universal settings — they are a function of the specific material, mold geometry, machine, and target wall thickness. When we start a new HVAC program, we follow a structured parameter development sequence that locks variables one at a time.

| Material | Barrel Temp (°C) | Mold Temp (°C) | Injection Speed | Hold Pressure (MPa) | Typical Cycle (s) |
|---|---|---|---|---|---|
| ABS | 200–240 | 40–80 | Medium–High | 40–70 | 20–40 |
| PA66 (Nylon 66) | 260–290 | 60–100 | Medium | 60–90 | 25–50 |
| ASA | 220–260 | 40–70 | Medium | 45–75 | 20–40 |
| PC | 270–310 | 80–120 | Slow–Medium | 70–100 | 30–60 |
| PP | 200–250 | 20–60 | High | 30–60 | 15–35 |
The most common mistake we see in transferred HVAC molds is carry-over process sheets from the previous supplier. Process settings are machine-specific — a 280-ton hydraulic press and a 280-ton all-electric press require different fill speed profiles even with identical molds. We always run a fresh DOE (design of experiments) on every tool transfer, starting with a 30% fill shot and stepping up.
Wall thickness is the hidden controller of everything else. At 2 mm wall, PA66 solidifies in roughly 8 seconds; at 4 mm wall, that extends to 28 seconds. Inconsistent wall thickness — common in HVAC housings where ribs meet flat faces — creates differential cooling, differential shrinkage, and warpage. We target wall-to-rib thickness ratios of 0.6:1 or less, and we enforce this in our DFM review before quoting.
“PA66 is the most widely used engineering plastic in HVAC injection molding.”True
PA66 (Nylon 66) offers a heat deflection temperature of 90–110°C (unfilled) to over 250°C (glass-filled), chemical resistance to refrigerants and cleaning agents, and inherent dimensional stability. In our factory, over 40% of HVAC structural components — fan blades, motor brackets, connector housings — are molded in PA66 or glass-filled PA66 grades.
“Mold temperature has little effect on HVAC part quality.”False
Mold temperature directly controls crystallinity in semi-crystalline materials like PA66 and PP. Running PA66 on a cold mold (30°C instead of the recommended 80°C) reduces crystallinity, lowers part stiffness by 15–25%, and causes surface sink marks. For outdoor HVAC units, low crystallinity also accelerates UV degradation. Mold temperature is not cosmetic — it is a structural variable.
Barrel Temperature and Residence Time
One parameter that surprises engineers new to injection molding is the importance of melt residence time — the duration that plastic sits in the heated barrel before injection. For heat-sensitive materials like flame-retardant PA66 or PC, excessive residence time causes degradation: molecular weight drops, color shifts, and in worst cases, volatile decomposition products create silver streaks and voids in the part. We set barrel shot size to consume 30–80% of the barrel volume per cycle, and we purge the machine during any downtime longer than 15 minutes on sensitive materials.
Screw design also matters more than most buyers realize. The standard general-purpose screw works adequately for ABS and PP, but sensitive materials like PC and filled PA66 benefit from barrier or mixing screws that improve melt homogeneity and reduce color streaking. If you are qualifying a new HVAC resin on an existing machine, always verify screw compatibility with the material supplier before committing to a production trial — swapping to the wrong screw after tooling sign-off creates a costly delay.
What Materials Are Used in HVAC Injection Molding and Why?
Material selection for HVAC injection molded parts is constrained by four variables: operating temperature, UV exposure, chemical contact, and regulatory requirements (UL 94 flame ratings). Picking the wrong material costs more than the tooling — you find out at field failure, not on the production floor.

ABS is the default choice for indoor HVAC enclosures and decorative grilles. It processes easily, takes paint and texture well, and costs 30–40% less than engineering grades like PC. Its weakness is UV stability — outdoor ABS yellows and chalks within 18 months without UV-stabilized compounding.
ASA (acrylonitrile styrene acrylate) addresses ABS’s outdoor limitation. We use ASA for outdoor condensing unit covers, split system side panels, and any HVAC component with direct sunlight exposure. ASA retains color and gloss for 10+ years without paint, which eliminates a coating operation and its associated VOC compliance overhead.
PC (polycarbonate) and PC/ABS blends are specified for HVAC components requiring impact resistance at low temperatures — thermostat bezels, electrical housing lids, and fan guard assemblies on roof-mounted units that must survive 30°C installation environments. PC molds at higher temperatures and requires more careful drying (4h at 120°C to below 0.02% moisture), but delivers impact strength 10× that of standard ABS.
How Does HVACore Control Quality in the Injection Molding Process?
Quality in injection molding is not an end-of-line inspection activity — it is built into the process control system. Our HVAC plastic component manufacturing operation runs SPC (statistical process control) on five critical parameters every cavity, every shot.
PP (polypropylene) is the cost-optimized choice for non-structural HVAC components — condensate drain pans, mounting clips, terminal block covers, and disposable filter frames. PP processes at lower melt temperatures (200–250°C) and delivers outstanding chemical resistance to refrigerants, cleaning fluids, and condensate. Its limitation is a low heat deflection temperature (55–65°C unfilled), which makes it unsuitable for high-side refrigerant circuit enclosures or components near motor waste heat. For these applications, glass-filled PP (20–40% GF) pushes HDT to 140–155°C at competitive cost.
Material qualification for HVAC injection molded parts extends beyond mechanical properties. Most commercial and residential HVAC products sold in North America require UL 94 flame ratings — V-0 for electrical enclosures, HB at minimum for structural housings. European markets add ROHS and REACH chemical compliance. We maintain a qualified material library of 400+ resins across ABS, PA, ASA, PC, PP, and POM grades — with current UL yellow card numbers and compliance documentation — so material selection does not become a certification bottleneck late in a program.

Real-Time Process Monitoring
The five process control parameters we monitor in real time are: (1) peak injection pressure, (2) transfer position (screw position at velocity-to-pressure switchover), (3) cushion position (residual melt ahead of screw), (4) mold temperature at cavity and core sides, and (5) cooling water inlet and outlet temperature differential. Any parameter drifting outside ±3σ of the baseline triggers an automatic alert and pulls the part for offline inspection.
First Article Inspection and Dimensional Certification
First article inspection (FAI) on every new HVAC mold uses CMM measurement against the 3D CAD nominal, checking 30–50 critical dimensions including snap-fit hook engagement depth, louver blade flatness, and mounting hole true position. We target Cpk ≥ 1.33 on critical dimensions before releasing to production. If a dimension falls short, we go back to the mold — not the process — to correct it.
In our factory, the most common first-article failure mode is weld line location on visible faces. Weld lines are unavoidable where two melt fronts meet, but their position is controllable via gate location and fill sequence. We use mold flow analysis to predict weld line locations during DFM and move gates to relocate weld lines to non-visible zones before committing to tooling.
In our HVAC production lines, we run 47 injection molding machines ranging from 80 to 1,600 tons. Over 12 years of manufacturing plastic components for HVAC OEMs, our first-pass yield rate on new mold programs has improved from 78% to 94% — driven primarily by mandatory mold flow analysis before any tooling sign-off and CMM-validated FAI protocols that we refuse to skip, even under customer pressure to accelerate launch timelines.
“Weld line strength in PA66 can be as low as 40–60% of the base material strength.”True
When two melt fronts meet, molecular chain orientation across the weld plane is minimal, creating a structural weak point. In HVAC fan blades and snap-fit arms subject to cyclic loading, weld lines in high-stress zones cause fatigue failure within months. This is why gate location decisions require upfront mold flow analysis — moving a gate 15 mm can relocate the weld line from a stressed arm to an unstressed rib, preventing field failure entirely.
“Visual inspection is sufficient to verify HVAC injection molded part quality.”False
Visual inspection catches cosmetic defects — surface sinks, shorts, flash, discoloration — but misses the structural and dimensional issues that cause field failures. Warpage of 0.3 mm on a sealing face, ovality of 0.2 mm on a snap-fit ring, or subsurface voids from gas trapping are all invisible to the eye but cause assembly failures and refrigerant leaks in service. Dimensional measurement (CMM) and functional testing are non-negotiable for HVAC components.
What Common Defects Occur in HVAC Injection Molding and How Are They Fixed?
Defects in injection molded HVAC parts fall into three categories: filling defects (short shot, weld lines, jetting), shrinkage defects (sink marks, warpage, voids), and surface defects (burn marks, silver streaks, tiger stripes). Each has a specific process lever.
| Defect | Root Cause | Process Fix | Mold Fix |
|---|---|---|---|
| Short shot | Insufficient fill / cold melt | Increase barrel temp or injection speed | Add vent pins, increase gate size |
| Sink marks | Insufficient hold pressure or thick walls | Increase hold pressure / time | Reduce wall/rib thickness ratio |
| Warpage | Differential cooling or packing | Balance cooling channels, adjust hold | Add cooling near hot spots |
| Weld lines on face | Gate placement | Adjust fill speed (minor) | Relocate or add gate |
| Burn marks | Air trap, excessive speed | Reduce injection speed in last 20% fill | Add vents at burn location |
| Flash | Insufficient clamping or worn mold | Increase clamp force | Rework parting line fit |
Warpage is the defect we fight hardest in large HVAC panels — return air covers, fan shrouds, cassette unit frames. The root cause is almost always differential cooling: one side of the part cools faster than the other, creating a bimetal-strip effect. Our approach is to instrument the mold with thermocouples and map the thermal gradient across the tool, then design a cooling circuit modification to balance it. This is cheaper than scrapping thousands of parts or accepting a warped assembly.
What Does the Injection Molding Process Look Like End-to-End for an HVAC Project?
If you are sourcing a new injection molded HVAC component, understanding the full project timeline helps you plan procurement and tooling budgets realistically. Here is the sequence we follow for a new HVAC plastic part from design to production shipment.

Weeks 1–2: DFM Review
Weeks 1–2 cover DFM review. We analyze the 3D CAD for draft angles, wall thickness uniformity, undercut geometry, and gate placement options. For a typical HVAC enclosure with snap-fit hooks, louver blades, and integrated cable guides, DFM typically surfaces 5–10 geometry changes before tooling starts. We return a written DFM report with recommended changes, rationale for each, and risk ratings if the change is rejected. Skipping DFM to save two weeks routinely costs four weeks of T1 rework — we have seen it happen enough times to make DFM non-negotiable on every new HVACore program.
Weeks 3–8: Tooling
Weeks 3–8 are tooling. For a single-cavity HVAC enclosure mold in P20 steel, machining takes 5–7 weeks. Complex tools with side-action slides, collapsible cores, or hot-runner manifolds extend lead time to 8–12 weeks. We use 5-axis CNC for the cavity core geometry, EDM for ribbed or textured features that cannot be milled cleanly, and manual bench work for parting line fits and polished A-surfaces. Each mold undergoes a dimensional inspection against the design model before being dispatched to the injection machine for sampling.
Weeks 9–11: T1 Sampling and FAI
Weeks 9–11 bring T1 sampling and first article inspection (FAI). We shoot the first parts, pull 5 samples per cavity, and CMM-check 30–50 critical dimensions against the 3D CAD nominal. Typical T1 resolution involves 2–4 steel correction cycles — cavity adjustments for dimensions outside Cpk 1.33, surface texture rework, and parting line refinement to eliminate flash. Materials are also qualified during T1: UL 94 flame specimens are cut and submitted for independent lab testing, and material lot certificates are filed with the program record.
Week 12 Onward: Production Ramp
One milestone that often surprises HVAC customers is the number of T1 iterations required before production release. On simple open-and-shut molds with two to three features, one correction cycle is typical. On complex HVAC housings with 8–12 side-action features, three to five correction rounds are normal. We include two T1 correction cycles in our standard tooling quotation and price additional rounds at a fixed rate — so there are no surprises on the invoice when complex tooling requires more than one pass through the metrology lab.

Week 12 onward marks the start of production. With a validated process and a Cpk ≥ 1.33 baseline documented for all critical dimensions, we transition to production scheduling. We target overall equipment effectiveness (OEE) above 85% on established HVAC programs. Cycle times across our HVAC portfolio range from 20 seconds for small PP clips to 90 seconds for large PC/ABS cassette unit housings. We provide SPC data sheets with every production lot for customers running formal PPAP or incoming source inspection (ISIR) qualification. For high-volume HVAC OEMs, we offer dedicated machine allocation to guarantee capacity during peak seasonal demand — typically August to October for North American commercial HVAC customers.
Frequently Asked Questions About Injection Molding for HVAC Components
What is the minimum order quantity for injection molded HVAC plastic parts?
There is no hard minimum, but injection molding becomes economically competitive versus machining or 3D printing at roughly 500–1,000 parts per year. Below that threshold, the tooling amortization cost per part is difficult to justify. For small HVAC programs with 200–500 parts per year, we often recommend a family mold (multiple different parts in one tool) to share tooling cost. For prototyping and early validation, soft aluminum tooling at 60–70% of steel tool cost is available for runs up to 5,000 parts.
How long does injection molding tooling take for a new HVAC component?
Standard P20 steel single-cavity molds for mid-size HVAC enclosures (300–800 cm² projected area) take 5–7 weeks from DFM sign-off to first T1 samples. Complex tools with side-actions, hot runners, or high-polish requirements take 8–12 weeks. Aluminum prototype tools are faster — 2–3 weeks — but have limited cavity life of 5,000–20,000 shots. Rush tooling is possible with dedicated machining capacity, but compressing a 6-week schedule to 4 weeks typically adds 20–30% to tooling cost and increases the risk of dimensional errors that require rework sampling.
Can injection molding produce HVAC parts with tight dimensional tolerances?
Yes. Standard injection molding achieves ±0.10–0.15 mm on feature dimensions for stable engineering plastics like PA66 and ABS. For critical sealing faces or precision shaft fits, we achieve ±0.05 mm with tightly controlled process conditions and post-mold dimensional sorting. The key constraint is material shrinkage — semi-crystalline materials like PA66 shrink 1.5–2.5% and require precise mold dimensioning to compensate. Amorphous materials like ABS and PC shrink less (0.4–0.7%) and are easier to hold to tight tolerances. We use mold flow analysis to predict shrinkage before cutting steel.
What flame retardancy ratings are available for HVAC injection molded plastics?
Most HVAC electrical enclosures and junction boxes specify UL 94 V-0, which requires that flame propagation stops within 10 seconds after the ignition source is removed and that no burning drips ignite a cotton indicator below the specimen. UL 94 V-0 grades are commercially available in ABS, PA66, PC, and PP through specific compounded formulations — typically halogen-free phosphorus-based systems for products sold in European markets. We can mold UL 94 V-0, V-1, and HB grades, and we provide lot-level material certification with UL yellow card documentation on every production order.
How does HVACore ensure consistent quality across high-volume HVAC injection molding production?
Our quality system for HVAC injection molding programs combines four layers: (1) real-time process monitoring — five critical parameters logged every shot with SPC alerts at ±3σ; (2) periodic dimensional checks — CMM sampling every 500 shots on critical dimensions; (3) material certification — incoming lot testing for MFI (melt flow index) and moisture content before any production run; and (4) PPAP documentation — full process control plans, control charts, and capability studies available for Tier 1 automotive and commercial HVAC customers.
How does injection molding compare to other HVAC plastic manufacturing methods?
Injection molding is the highest-throughput, lowest-per-part-cost method once tooling is amortized, making it the standard choice for HVAC components produced in volumes above 1,000 units per year. Compared to thermoforming, injection molding offers tighter tolerances (±0.1 mm vs. ±0.5 mm), thinner walls (0.8–3 mm vs. 2–6 mm), and integrated snap-fits or ribs impossible in a sheet process. Compared to CNC machining, injection molding costs 80–95% less per part at production volumes. The tradeoff is upfront tooling investment — typically $5,000–$80,000 depending on part complexity — which makes injection molding uneconomical for one-off or very-low-volume HVAC prototype needs.
Why Choose HVACore for HVAC Injection Molded Plastic Components?
Choosing an injection molding partner for HVAC components is a fundamentally different decision than selecting a commodity supplier. The difference lies in process discipline: who validates wall thickness during DFM, who runs mold flow analysis before cutting steel, who instruments the mold with thermocouples at T1, and who refuses to release a mold to production until Cpk ≥ 1.33 on critical dimensions. These are not value-added extras — they are the core activities that determine whether your HVAC product achieves its target service life, passes field reliability testing, and avoids the costly recalls and warranty repairs that result from premature part failure.
At HVACore, we have manufactured injection molded plastic components for HVAC OEMs across North America, Europe, and Japan for over a decade. Our programs span 80-ton small-part tools for snap clips and sensor housings to 1,600-ton large-format molds for split-unit chassis and cassette enclosures. We bring the same CMM, SPC, and mold flow rigor to a 500-part prototype run as to a 200,000-part production program. If you have a new HVAC plastic component to develop or an existing tool to transfer, contact our engineering team for a DFM review and tooling quote.

-
cycle time: Cycle time is the total duration of one complete injection molding cycle—from mold close to part ejection—measured in seconds. It determines machine utilization and per-part production cost. ↩
-
gate location: Gate location is defined as the point where molten plastic enters the mold cavity. Its position directly affects fill pattern, weld line placement, and cosmetic appearance of the finished part. ↩
-
clamping force: Clamping force is the pressure applied to hold a mold closed during injection, measured in tons. It must exceed the force of molten plastic pushing against the mold cavity walls. ↩
-
hold pressure: Hold pressure is the secondary pressure applied after mold filling to compensate for volumetric shrinkage as the plastic cools, measured in MPa. Insufficient hold pressure causes sink marks and dimensional variation. ↩
-
mold flow analysis: Mold flow analysis refers to simulation software that predicts how molten plastic fills a mold cavity, identifying potential defects such as weld lines, air traps, and sink marks before tooling is cut. ↩